Hang Tags and Price Tags: What Are They & How to Use Them for Brand Impact
You already know what hang tags and price tags are.
The problem you’re probably facing is that managing such a seemingly small yet essential part of the product lifecycle is time-consuming, tedious, and incredibly resource-intensive.
Your process probably looks something like this:
- Bring a new product into your range, or choose to update an existing one
- Research prices and view competition
- Define a suitable product price
- Count and manage inventory to ensure you have the correct number of tags.
- Create a design for your price tag, incorporating your logo, colors, and other branding elements.
- Carefully print the tags, ensuring the quality is up to par with your brand standards.
- Cut and attach the tags to each product, ensuring they are positioned correctly and securely.
- Double-check each tag’s price to ensure it matches the intended selling price.
- Add additional information to the tag, such as care instructions or a brief product description.
This process, while necessary, can be a significant drain on your time and resources. It can also be prone to errors, such as miscounting inventory, printing errors, or incorrect pricing.
All for something so crucial – quite literally making or breaking the success of that product. If you get it wrong, you’ll need to go through the entire process again from scratch.
And who thought this was just about writing labels?
But here’s the thing: most retailers are barely scratching the surface of what their hang tags and price tags could be doing for their business.
Whether you’re managing a boutique store or overseeing a national retail chain, understanding the strategic power of your tags isn’t just about pricing anymore – it’s about creating those perfect micro-moments that connect with your customers.
In this guide, I’ll show you exactly how to transform these essential retail tools from basic necessities into powerful brand ambassadors faster, more efficiently, and more productively than ever before.
Understanding Hang Tags vs Price Tags

So many tags. So little time.
First and foremost, let’s get on the same page when it comes to these little pieces of retail real estate.
What Are Price Tags?
Price tags show the price of the product they’re attached to. Straightforward?
Well, yes and no.
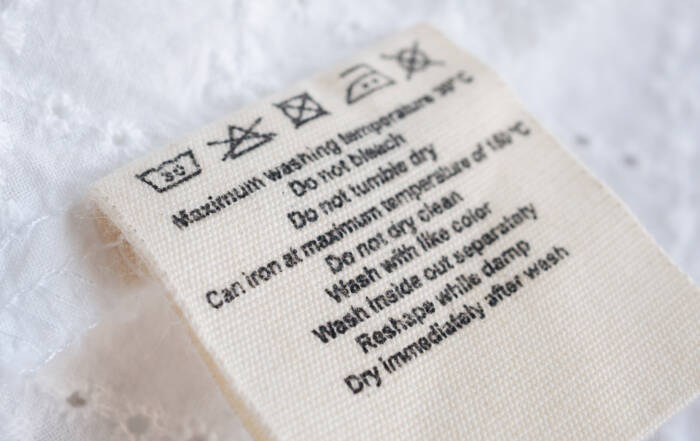
While their primary function is displaying the cost, modern price tags are working much harder for successful retailers. For example, they display care instructions for individual products, country of origin, barcode infrastructure, etc.
Price tags can also be seen as crucial legal components. For example, U.S. retail pricing laws require precise, accurate price displays.
But within these requirements, you’ve got options:
- Traditional adhesive tags
- Hanging price tickets
- Electronic price tags (which are seeing a 15.8% growth rate from 2024 to 2030)
I’ve seen too many retailers treat price tags as an afterthought.
But consider this: Google cites that 90% of consumers make purchase decisions based on price transparency. Your price tag isn’t just showing a number – it’s communicating value.
What Are Hang Tags?
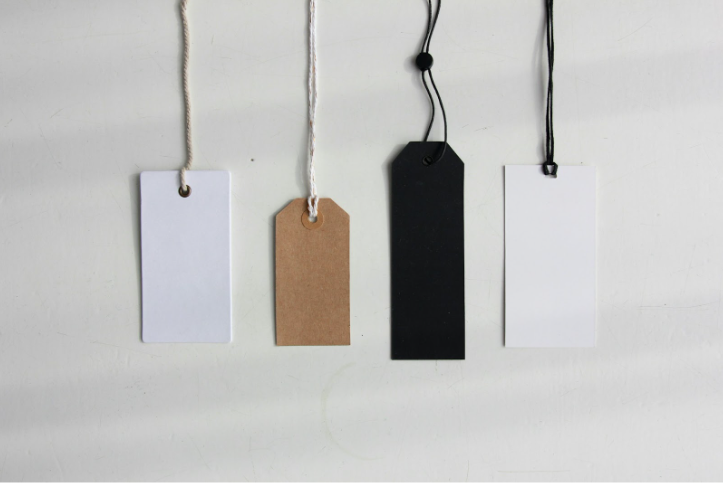
Hang tags (or swing tags, as they’re known in some parts of the retail world) are very similar to price tags, except they are more decorative and not as simple. Yet they’re far more than just pretty accessories.
Data from the National Retail Federation shows that 72% of consumers say detailed product information on tags influences their purchasing decisions.
I typically see three main types in the market:
- Brand story tags that share your company’s values and history
- Product information tags detailing materials, care instructions, and features
- Promotional tags highlighting special offers or collection pieces
Here’s a pro tip I always share with my clients: your hang tag is often the first “conversation” a customer has with your product. Make it count.
The key difference?
Think of hang tags as your brand storytellers and price tags as your value communicators. When used strategically together, they create a powerful duo that can significantly impact your sales performance.
The Strategic Value of Tags

When it comes to hang tags, sometimes less is more.
Let’s talk about turning your tags into genuine brand assets and what they can do for you rather than just advertising a product’s price. Those who view tags in this way are leaving money on the table.
Brand Impact
There’s no doubt that high-quality, well-designed tags increase perceived product value. Think about your own experiences in a store where you’ve felt the hard card of a product tag with the price, produced logo, and the quality of it all.
The product feels more valuable, thus customers are willing to pay the extra. These tags feeling like little pieces of art is no accident. Brands who apply this understand that when it comes to retail, every touchpoint matters.
Apply this to your own brands, where your own tags could showcase:
- Your brand story and heritage
- Sustainability commitments
- Unique selling propositions
- Quality guarantees
Pro tip: Treat your tags as mini-billboards. Every square inch is valuable real estate for building brand recognition. Use it to your advantage, and you’ll position yourself far above your competitors. The devil is in the details.
Customer Experience
While statistics vary (depending on the nature of a product, whether you’re online or in-person, and environmental factors), modern shoppers tend to make an opinion on a product and the business between 50 milliseconds and 7 seconds.
That’s an extremely small window to catch a shopper’s attention and have them view your products favorably. Your tags need to work hard during that time frame.
From my experience, here’s what makes tags truly effective for customer experience:
- Clear information hierarchy (what they need to know first)
- Emotional triggers (sustainability badges, handcrafted symbols)
- Quick-scan features (clear pricing, size information)
The thing to remember here is that a confused customer doesn’t buy. Only one who trusts and likes what they see will. That’s what you’re aiming for through your tag design.
Your tags should make decision-making easier, not harder. Every element, from font choice to material texture, should align with your brand’s overall customer experience strategy.
Best Practices for Tag Design

Is it time to give the gift of a proper price tag experience in your store?
Tags are important, and when used in the right way, they can do a lot of heavy lifting when selling your products and your brand. But how do you actually make the most of this small-yet-mighty space?
Here at SilkPLM, this is what we do best, so let me share some insider knowledge that’ll help you avoid common pitfalls and create tags that actually perform.
Design Elements
First things first – size matters, but not how you might think.
In my experience, the sweet spot for hang tags is typically between 2″ x 3.5″ and 3″ x 4″. Why?
It’s all about balancing visibility with practicality. Anything larger becomes cumbersome; anything smaller limits your brand real estate.
Here’s my tried-and-tested hierarchy for tag design:
- Lead with your brand identity (logo placement is crucial)
- Follow with key product features
- End with practical information (price, size, care instructions)
When it comes to materials, sustainability is no longer optional.
Recent retail studies show that 73% of global consumers would change their consumption habits to reduce environmental impact.
I’m seeing more brands switch to recycled papers and biodegradable materials – it’s not just good for the planet, it’s good for business.
Content Guidelines
When it comes to actually putting stuff on your tags, you’re trying to sit on the fine line between overflowing with information and missing out crucial elements.
Essential information checklist:
- Product name/style number
- Price (following local pricing regulations)
- Size/dimensions
- Material composition
- Care instructions
- Country of origin (it’s legally required in most cases)
- Barcode/SKU
Pro tip: Use QR codes strategically. They can provide additional product information without cluttering your tag design. Global data found that 56% of UK customers said it would be useful if origin, product stories, and sustainable information could be accessed via a product’s QR code.
So you can assume that 56% of customers would be more engaged in a product if this is what you offered.
Oh, and remember those legal requirements I mentioned? Different countries have different rules about what must be included on tags.
For instance, textile products in the U.S. must list fiber content, country of origin, and care instructions according to FTC guidelines. Always check local regulations – it’s better to be safe than sorry.
And while we’re here, here’s something most don’t consider: negative space.
In tag design, what you don’t include is just as important as what you do. Keep your design clean and scannable. Studies show that consumers are more likely to retain information when it’s presented with adequate breathing room.
How to Maximize Hang & Price Tag Effectiveness
Let’s talk implementation – because even the best-designed tags won’t work if they’re not used correctly. After years of testing and optimizing, I’ve got some game-changing tips to share.
Implementation Tips
Placement is everything.
Think about how your customer naturally interacts with your product.
For apparel, I always recommend positioning hang tags where they’ll be noticed without interfering with the try-on experience. The top right corner typically gets the most visual attention – that’s prime real estate for your brand message.
When it comes to attachment methods, don’t skimp on quality. I’ve seen too many retailers lose sales because of fallen tags. Here’s what works:
- Swift attach systems for clothing (the industry standard)
- Adhesive tags for hard goods (using retail-grade adhesives)
- Loop strings for accessories (aim for 6-7 inches to avoid tangling)
Automation Benefits
And finally, I understand that all of this might feel like a lot of work. Far more than you’re doing already, and wasn’t the point of this guide to talk about how you can save time and get more from your tags?
Well, that’s where automation comes in.
Here at SilkPLM, we specialize in creating AI-powered design solutions specifically geared towards retail and commercial products.
Never again manually designing hundreds of different tags. Using professional design software like Adobe InDesign with templates can cut your tag production time by up to 70%.
Here’s what smart automation can do:
- Maintain brand consistency across all tags
- Reduce human error in pricing and product information
- Scale your tag production efficiently as you grow
Conclusion
As you can see, your tags are more than just price displays – they’re mini-marketers working 24/7 for your brand. By implementing these strategies, you’re not just creating tags; you’re crafting powerful sales tools that work even when your sales team isn’t around.
Ready to take your tag game to the next level?
I’ve created a free template pack that includes all the essential tag designs we’ve discussed.
You can check out the guide here to get started.
Remember: in retail, every detail matters. Your tags might be small, but their impact on your brand and bottom line can be huge.
Fashion Labels: The Essential Guide for Clothing Brands
Fashion labels play a crucial role in your brand and shape how customers perceive your product. If you're launching a new product line and feel unsure about how to select the right labels, this guide will serve as your go-to resource!
Guide to Care Labels for Fashion Brands: Compliance & Sustainability
Care labels are a vital communication tool for customer satisfaction, legal compliance, and reinforcing your brand values. Whether you're a fashion startup, e-commerce business, or independent designer, understanding care labels is non-negotiable.


